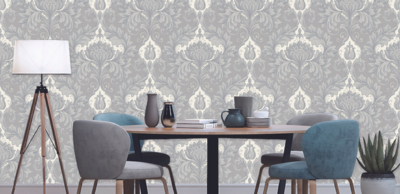


How to measure mouldings?
The first step is to measure. Each section of wall that will receive a skirting board must be measured. Don’t do this calculation with a ladle, this will prevent you from going back to look for additional skirting boards due to the lack of correct estimates.

Before proceeding with any cornice installation, you must first know the length of cornice required. And this requires that you know the length of the room’s perimeter. To do this, take a tape measure and measure the length and width of the room. Calculate the perimeter of the room (L+l) ×2 for those who have forgotten the formula. Generally, cornices of 2m length are sold on the market. To find out how many pieces you need, simply divide the perimeter by the length of the stick. Always remember to buy an extra cornice if you need one.
Determine the height at which you want to position the picture rail and take your measurements. Use a level to draw a straight line.
How to cut the mouldings?
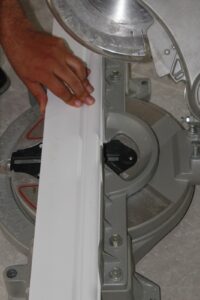
For a very clean cut, use a blade with 72 teeth or more. The more teeth the saw blade has, the finer the result. Follow these steps to cut your skirting board properly: Calculate the mitre angle and mark it on the skirting board with the pencil. Set the mitre saw to the right angle. Place the skirting board securely on the saw table. Hold the skirting board firmly and lower the saw blade just above the material to be cut. Start the saw and lower it gently through the skirting board.
You should check whether it is an outward or inward angle before cutting. If the walls are straight, the cut is usually made at 45°. Simply saw the cornice along the notches that are noted. If the walls are not completely flat and orthogonal, you will have to make some alterations and several attempts to make the connection perfect.
To cut an inside corner, press the back of the picture rail against the saw stop. The mitre is set at 45 degrees, while the saw handle has no inclination. The angle is given to the left or right depending on whether it is a left or right inner corner. Then nail the mouldings to hold them in place. For outside corner cuts, make the same adjustments as explained in the previous step. The difference is in the portion of the moulding that you will keep. For the outside corner, keep the opposite part to the one kept for the inside corner. Then follow your installation to the end of the wall.
How do you apply the glue and glue them?
Apply glue to the back of the skirting board. Make waves on the central part along the whole length. Do not go near the edges of the skirting board, as this could cause burrs.

Apply glue to the back of the cornice. Make waves on the central part along the whole length. Do not go near the edges of the skirting board, as this could cause burrs.
Apply glue to the back of the picture rail. Make waves on the central part along the whole length. Do not go near the edges of the skirting board, as this could cause burrs.
How to glue the mouldings to the walls and join them?
Position the plinth along your wall and hold it for about 20 seconds at several points along its length so that the adhesive adheres properly. Place the nozzle where you want to start grouting. Squeeze the handle and run the gun along the joint in a continuous motion. Apply enough sealant all over to ensure a good adhesion of the product. Smooth the joint and remove the masking tape immediately. Press gently to smooth out raised edges.

For simple gluing, apply a bead of glue to both sides of the cornice that will come into contact with the ceiling and wall. The layers of glue should be one centimetre thick and should not overflow. Then press the cornice against the wall in the intended position until the glue sets. Then remove the excess glue. Connect and mask the junction between the different cornices with special joint filler, which you apply in a thin layer with the spatula.
Position your picture rail along your wall and hold it for about 20 seconds in several places along its length so that the adhesive adheres properly. Place the nozzle where you want to start grouting. Squeeze the handle and run the gun along the joint in a continuous motion. Apply enough sealant all over to ensure a good adhesion of the product. Smooth the joint and remove the masking tape immediately. Press gently to smooth out raised edges.